Followers

Friday, 10 April 2020

Really Cute Mini notebook embellishments/key rings


Hi Crafters

Today I have something different for you. I saw it on YouTube, as I was trawling through Junk Book makes, and just had to make it. 
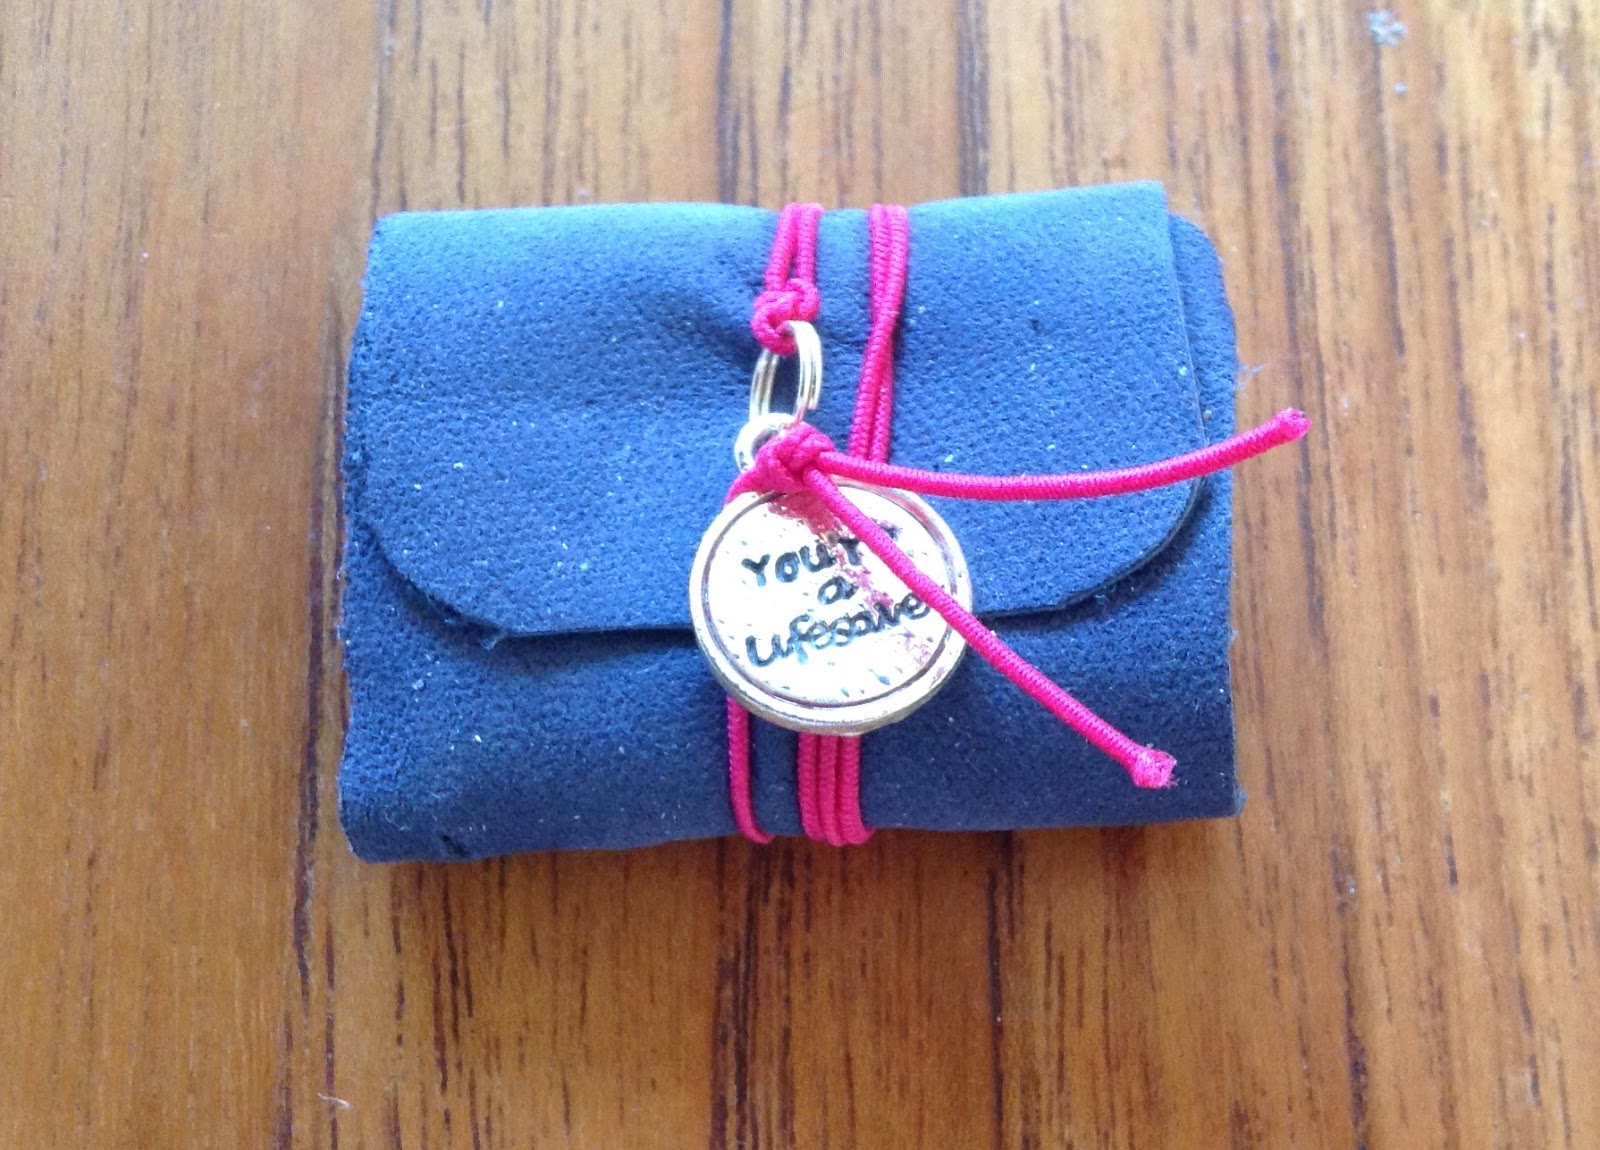


I make leather flowers sometimes and have dabbled with leather brooches, so have several bags of scraps. These mini-books are perfect to use them up

Simple cut strips of leather 3-4cm wide and 8-10cm long
Fold in 3 to represent the notebook and measure the space inside the first section.
Put several pieces of copypaper together and cut strips to fit inside this space, concertina the folds and then cut to make the pages for the notebook .

Place a small hole in the fold of the leather and add a metal ring to take your keyring or clip
Next using heavy thread or bakers twine stitch the pages into the book. to hold the notebook together wrap elastic around the notebook, if you have a very small charm thread through the elastic to decorate. 

The completed mini book can be used to hand from you handbag or as ephemera for your scrapbook projects. They are so cute, but be careful they are addictive. I have another 6 waiting to be sewn together. The finished item measures about 3.5 x 4cm 

Happy Crafting and Stay Safe
Dee

Thursday, 9 April 2020

A few more mini Memory/Brag books

Hi Crafters

Before putting away my 6 x 6 pads, I decided to make a few more mini Brag/Memory books
The 3 I made last week have all been used, and so while the projects was still clear in my mind I made another 3 to add to my Happy Mail pile.

The previous makes had been sent out to Ebay buyers and one used of the Mini Album.

Here are the new makes 


See you soon 
Dee

Wednesday, 8 April 2020

Shabby Chic Envelopes - Using up your 6 x 6 pads

Hi Crafters

Yet another idea for using up your 6 x 6 pads

I was just about to put away my pads used for previous projects when I thought of these lovely little envelopes for junk journals or mini albums

They are so quick and easy to  make and can be used for storing embellishment and beads as well as for your paper projects.

Simple score the page on 3 sides at 1.5cm
With the unscored side on the left, fold over to meet the score line on the right.
Next fold all score lines, and cut ready for an envelope
You will have something that looks like this


You can choose whether to distress the edges of the envelopes, I did, as I wanted to add interest before stamping onto the envelope.


As you can see I managed about 15 envelopes in a couple of hours 

I used Tim Holtz distress inks and some old solid wooden stamps for the prints added to the front. These envelopes will be added to Journals or to give little treats away.

Dee

Tuesday, 7 April 2020

Alternative Greeting Cards

Origami Alternative Greeting Cards

Hi Crafters

Today I went back to a Christmas project I  made for the Craft sales in 2018. I was given a pretty origami star that a friend picked up whilst in Germany. They sell them in the Christmas markets on the continent. The stars are  often exchanged at Christmas, between friends, and then used as decorations, so I think of them as friendship cards

Whilst the Christmas style are made to finish in a star, I have made them today with a simple square fold and a more ornate flower shape folded in the same way.

I had to revisit my previous makes to remind myself how to fold them, but I enjoy making them and will be making more for this Christmas. 

The first ones I made used Japanese origami papers as they are so pretty and I have a birthday coming up with someone who loves all things Japanese. 


You start with a square. Fold in half , unfold turn and fold in half the other side.
Turn the paper over and fold diagonally.
You should now be able to fold in the sides to form a square.
You will need 5 or six of these folded sqaures to make each card. Making sure they are all in the same direction, glue one on top of the other.
Using a piece of narrow ribbon or cord, fold it in half and thread the folded end through a bead, tie a knot in the folded end to form a loop and stop the bead slipping off. 
With the open ends of the card at the top add one piece of ribbon to the front centre and the other to the back centre 
Next  cut 2 squares of card to fit just inside the square and glue over the top of the ribbon 
This card is for the sentiments. Either stamp or add 3D greetings to the front, leaving the giver the back piece to write their message.

By adding the ribbon in this way when the card is flat the bead keeps it closed, you then slip the bead up unfold the folded pieces and slide the bead down again to hold the shape open. It can then be hung as a decoration.

Here are the flower shaped cards I made using the same method


 I will be selling these on Ebay as Alternative greeting cards 
They are so cute and a pretty greeting for friends and family.


Happy Crafting and stay safe
Dee


Sunday, 5 April 2020

Folio ALbum - USing up your 6 x 6 papers

Hi Crafters

Here is a great Folio/Mini Album made with more of my 6 x 6 papers.

This album will hold 15 photographs on the waterfall section and more in the booklet added to the left flap of the file

It has been made to look like a clutch bag and is held together with an elastic button fastener.


When you open up the folio it has a waterfall on the right side and a pocket on the left side.
The folio is made from 1 sheet of A4 card. I used black 300gsm for a sturdy folder. Covered with a sheet of K & Co paper. Scored at 10cm, 10.5,11,12,12.5, 23,23.5,24,24.5,25,. Fold over all the score lines and use your corner punch at the top. This gives a curved top and bottom to the folio.


There are seven sheets of paper forming the waterfall and these are simply cut to 10cm width and with a cm fold at the top glued in place down the page. The base of the album is covered first making 15 sections altogether. Each sheets has a smaller inset piece of paper and a piece of matching size on the reverse.

The left side has had a double folded flap added so it can hold memorabilia photo mats or as with this one the booklet made yesterday. You could make a concertina panel and cut a half circle in the centre 


I have added the booklet made yesterday to this side of the folio, but you could make more photo mats and slip them in as well as Journal Tags.

I loved the papers used on the outside so have not made any decoration for the front of the album
Just made an elastic button fastener with a shell button and gold elastic. You do this by threadign your elastic through the button and tying in the middle of the ealstic then join the two ends together.
When you place the button in the centre of the folio and wrap the elastic end around the folio, slipping the joined end over the button as a closure.

Happy Crafting 
Dee

Saturday, 4 April 2020

Coffee Break Craft item - Mini Brag Book

Hi Crafters

Today more ideas to use your 6 x 6 stash of papers.

I have lots of pads bought when on sale, so this quick coffee break craft is ideal to use up some of the papers in my box.

Simple take 8 sheets of 6 x 6 and fold in half with the 
white side out. Place on your craft mat and glue one on top of the other.
After you have glued 4 together take a fine piece of ribbon about 8" long and glue onto the page on the binding side with about 3 inches of the ribbon inside the page and the rest outside the book.
Continue adding pages until you have the eight sheets together
Cut a strip of paper 6" x  3"  and glue half to the front left hand side, fold over and glue the other half to the back of the pad . Do not pull it tight as this will act as the binding for the booklet.
Next cover the front and back with matching papers cut 6" x 2.5" wide.

Add some beads or embellishments to the ribbon at the side to finish your booklet.

You can make these very quickly and decorate as much as you wish. They make great litle swaps or gifts for friends. 

Tomorrow I will show you how I added this booklet to a folio album using more of the same pad for a coordinated waterfall photograph section.

Happy Crafting
Dee

Friday, 3 April 2020

Great Gift Box - simple and quick

Hi Crafters

As promised here is the really simple gift box.
It is from a design from Crafters Companion using their A3 Scoreboard.
I am just surprised I had not thought of it before
If you have a scoreboard that acts as  a box maker or a box maker board, this is how you make this great gift box literally in minutes

Decide the depth of your box
I used a 12 X 12 sheet for the first box, and I wanted it to be 1 inch deep.
So I scored at 5.5" ,and 6.5" giving me an inch in the centre of the paper.
Turn the sheet and using the box top scoring lines score an inch down to the score lines
Turn the paper and score 1inch along the top, turn again and score 1inch again down to the middle score line. You now have an inch score line all around the top half of the sheet.

Next using the base score lines repeat the 1inch scoring around the bottom half of the sheet scoring down to the middle score line.
You now need to cut  all four corners  as you would when making a box and cut up the sides to the 1inch score line in the middle, so that the middle flaps are able to fold in .
You should now have a box where the top is just slightly bigger than the base, either store flat now or glue the corners together ready to use


Having made this box from a 12 x 12 I was ready to try an A3 piece of card and here is the result.
With this box I wanted a window top and so I scored the box as before making a 1" score line through the centre and then the top half scored an inch around with the box lid score lines and the bottom half an inch around with the box base score lines 


Before gluing together I cut our the window area on the card and this was a section 9.5cm x 16.5cm 
I cut a piece of acetate 10cm x 17cm and fitted to a sheet of paper to decorate it (again cutting out the middle section. The paper was cut at 13cm x 23cm leaving a 2cm width around the top of the box lid.

The completed box measure 25cm wide by 15cm with 1" depth . Sorry about the mix of inches and centimetre but thats how I worked out the measurements .

This box took a little longer but you could easily decorate it with a simple strip of coordinating paper and a bow and this would not take long at all . The first box took me less than 15 minutes to make the basic box. The same principles can be used to make any size box, just decide on the depth and make the sides the same width when scoring your folds.

Back tomorrow with a more ways to use your 6 x 6 papers. So be sure to pop back and please click on the FOllow button at the top of the page if you would like to comment or ask a question.

Dee