Followers

Thursday 28 April 2022

Reliving and Reloving your Stash

 Hi Crafters

There has never been a better time to go through your craft stash. With all the global problems at the moment,  checking out and sorting your craft items will not only tidy your craft area, hopefully it will inspire you to use what what you already have. 

Recently I have been inspired to use my scraps to make cards, check out Sam Calcott  (Mixed up Crafts) videos. The craft group I attend liked them so much they decided to make them the following week and the cards I made sold out as soon as I put them on the Trade Table. 

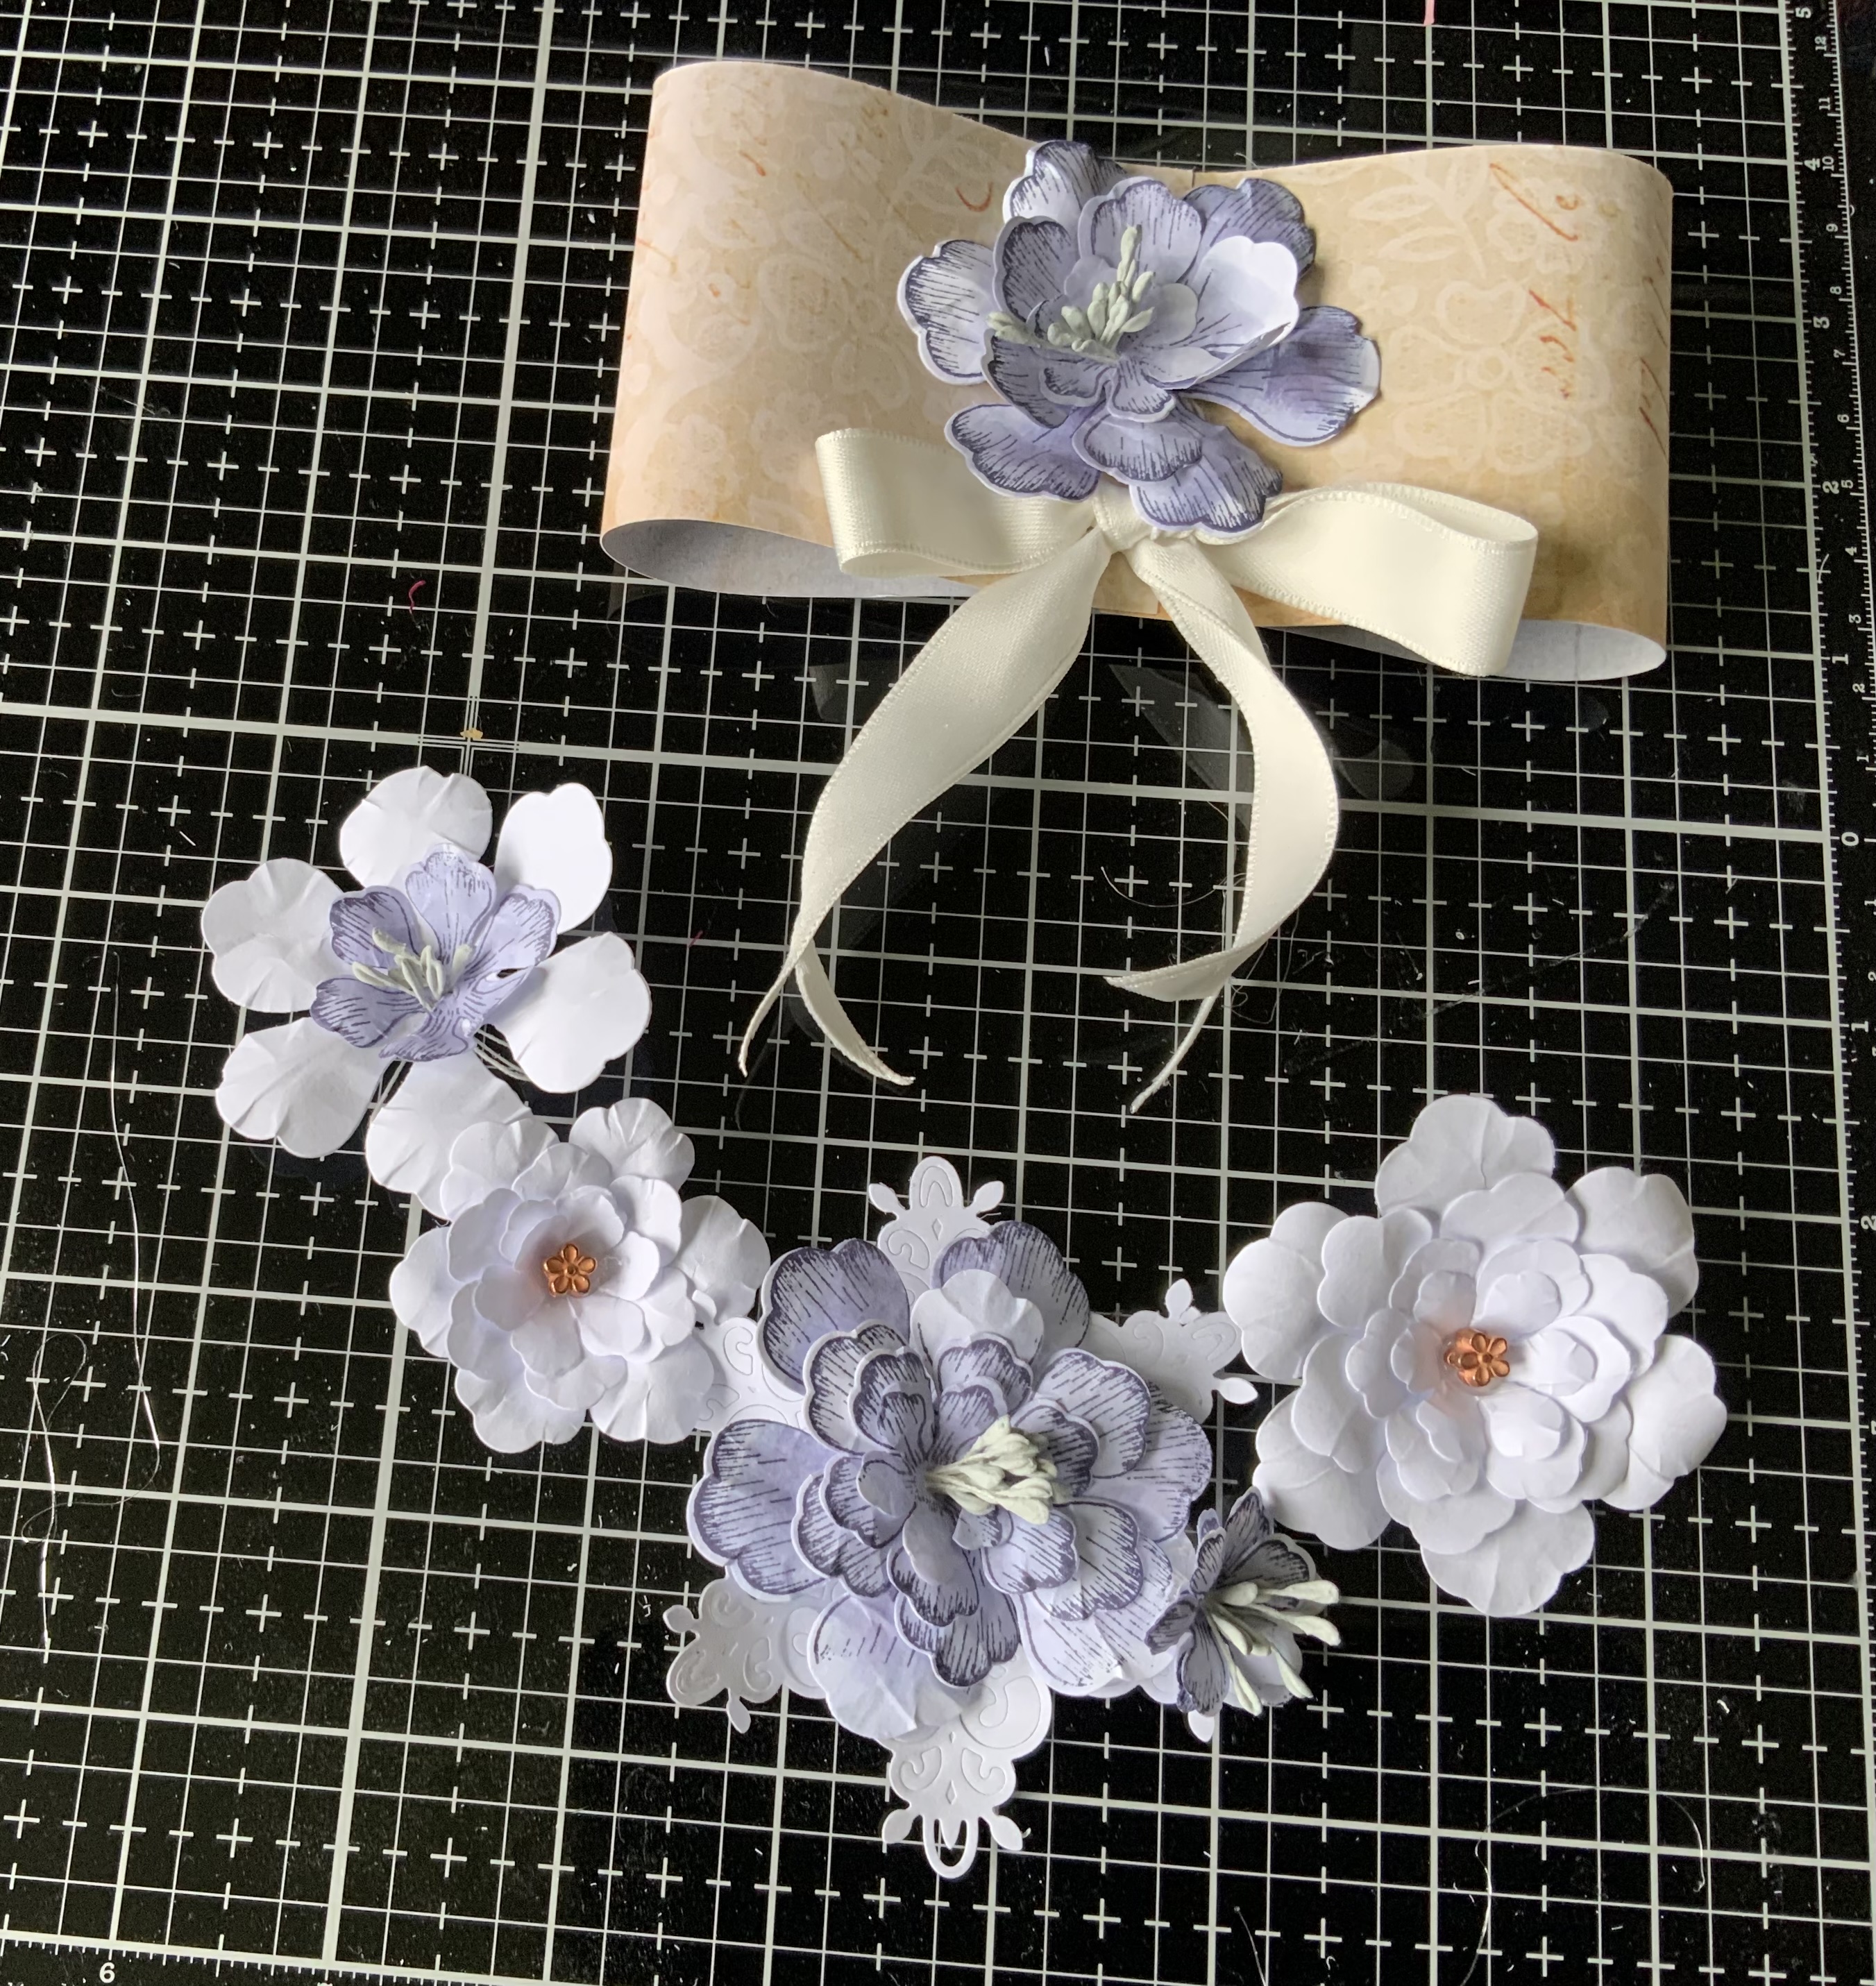
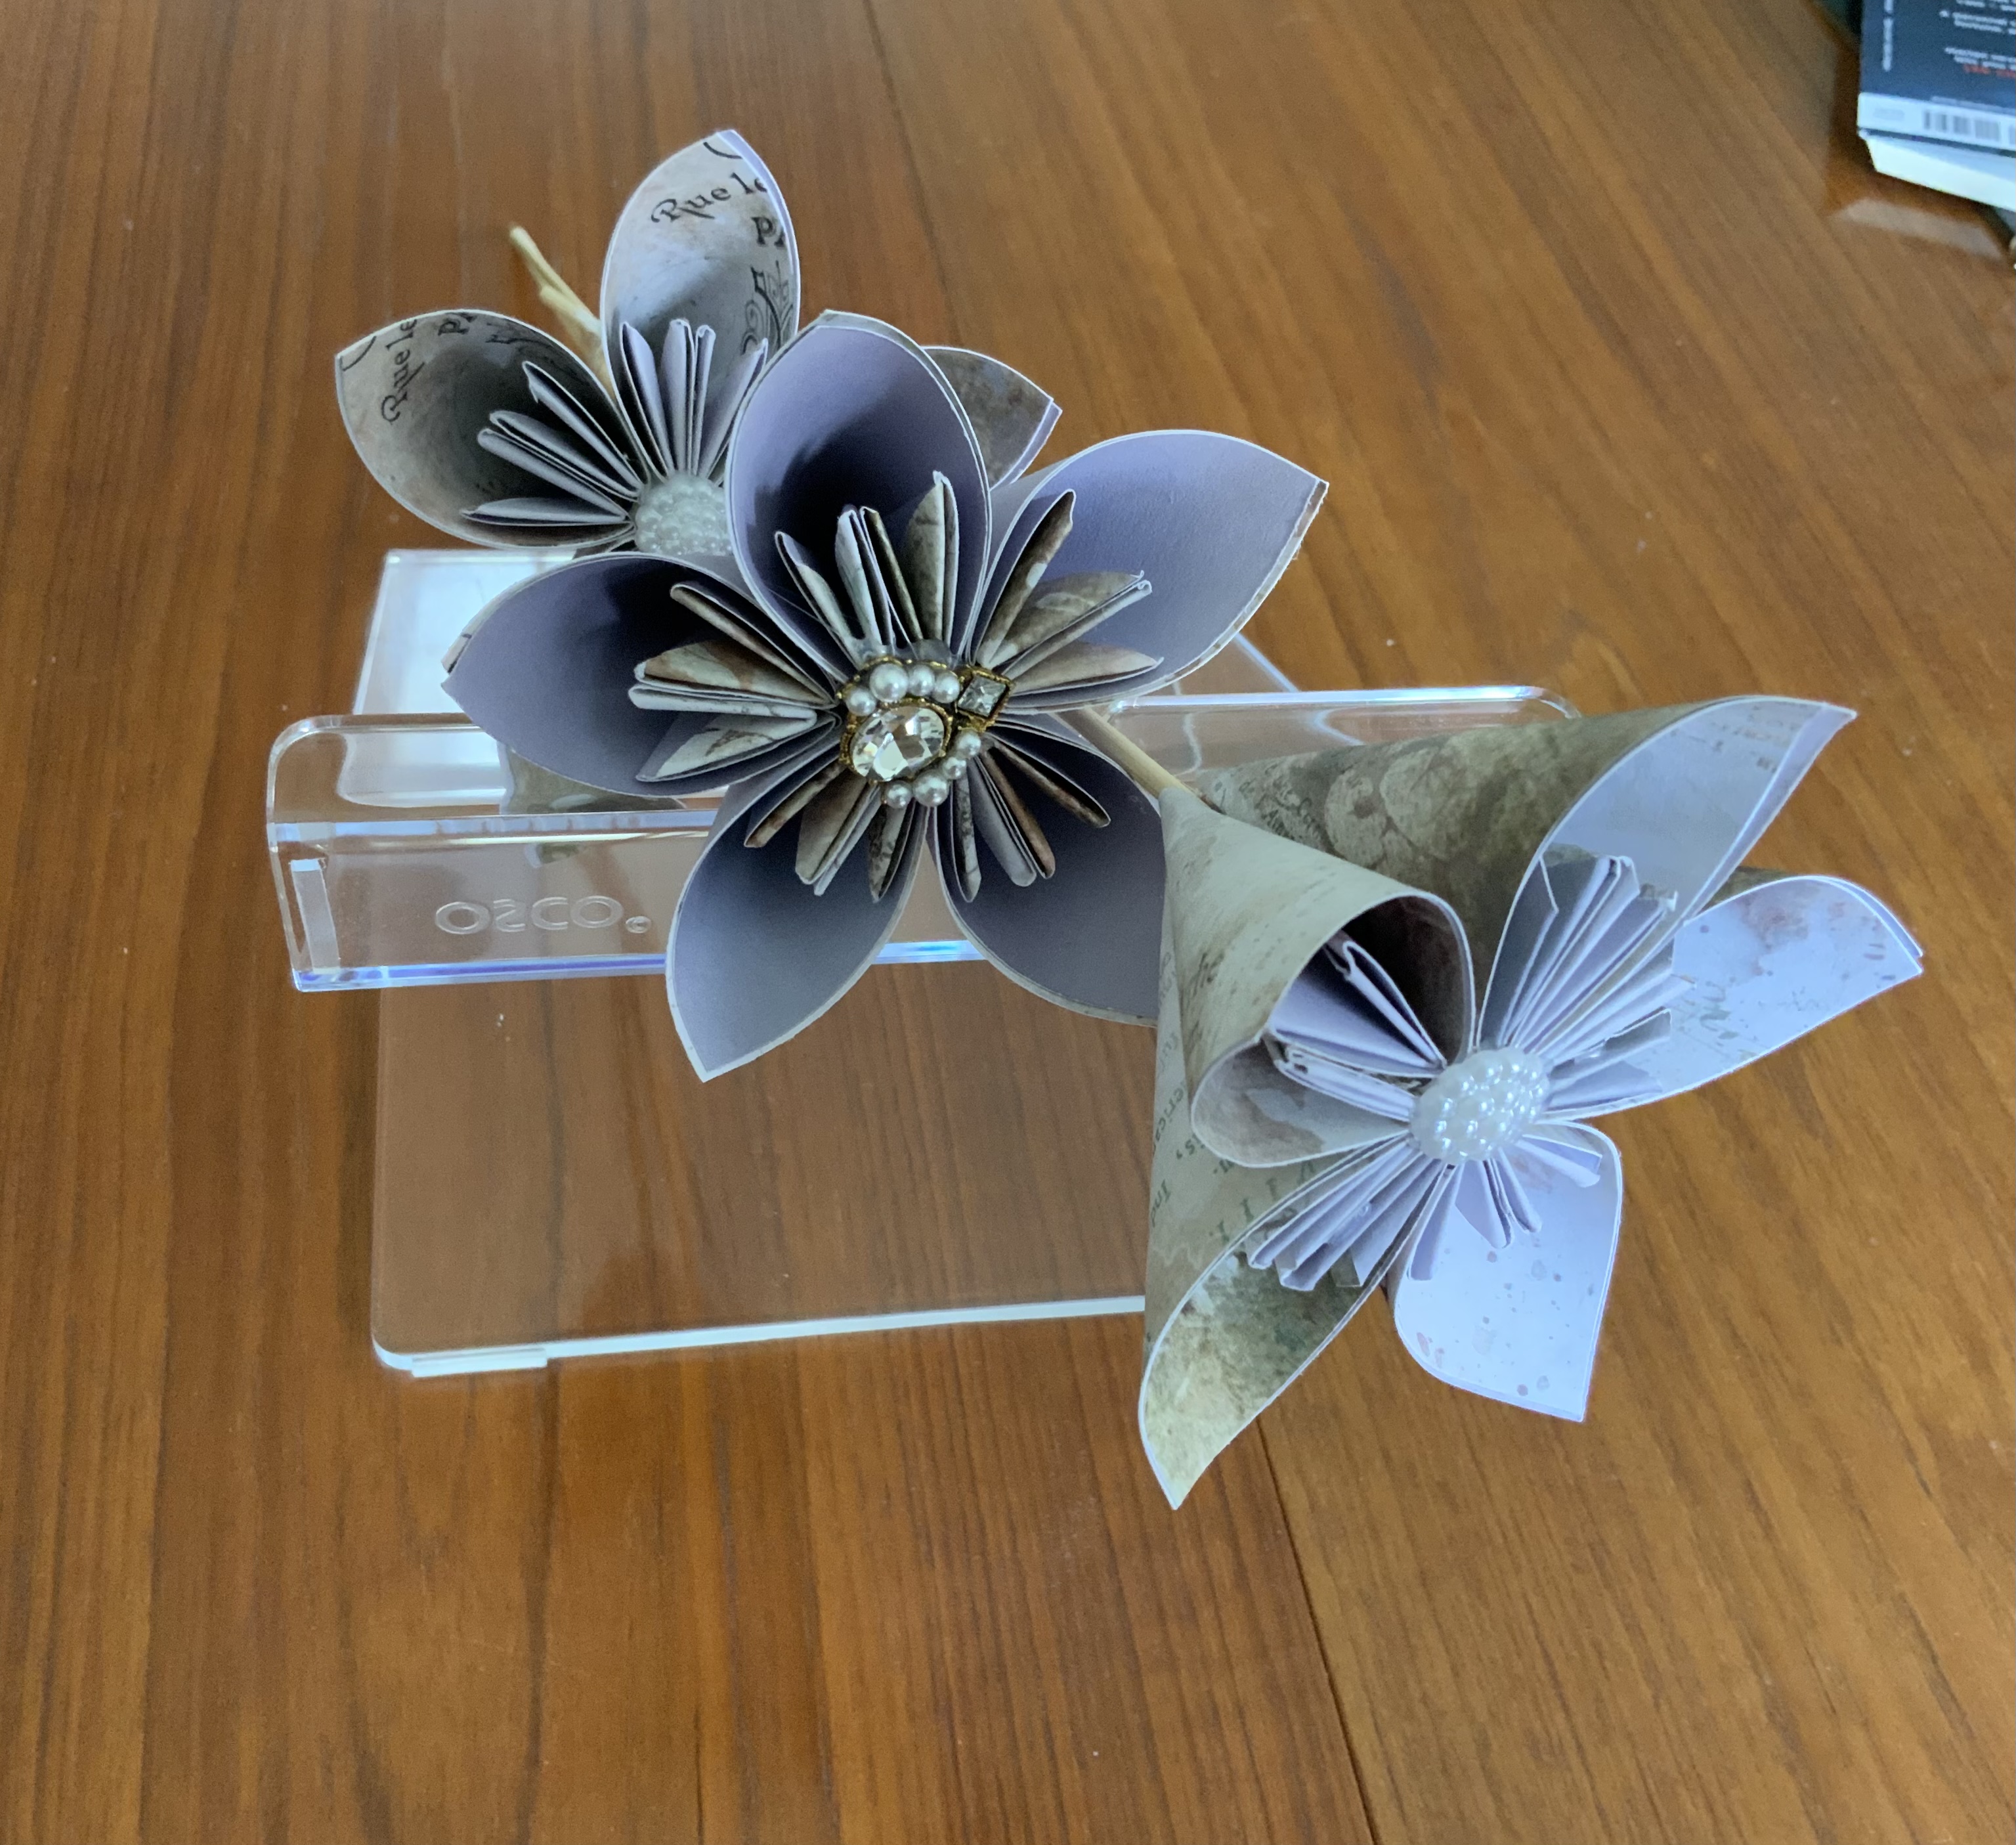
Here are some I have made since 


All made with scraps of card and oddments from my craft stash.

With the dull weather returning this weekend I decided to clean up my papers and went through several boxes in the craft room to tidy and sort, starting with the 12 x 12 pads. It was great to see what I had, a little like Christmas revealing papers I had forgotten I had and boxes with so many papers I made a couple of bundles for Ebay , (I also do car boots a couple of times a year) where I sell any craft items I am not likely to use. Mainly papers and dies. I even found an Anna Griffin 12 x 12 paper pad I had forgotten I had and which although lovely and new I decided to sell as I have a lot of her lose papers. 

I have accumulated so many papers over the 20 plus years I have been crafting, some in my stash go back to QVC craft time, particularly K & Co, Anna Griffin and DCWV. I found lovely soft papers that would be perfect for my origami items and a few heavier papers that would suit gift boxes. Stamperia packs and Fabrika paper packs that I bought for Journals. I really enjoyed revisiting these buys and having reminded myself of my craft box contents I will hopefully look in the boxes for my projects this year and use my stash rather than buy more. Retail is no doubt going to suffer in the year ahead, I am not saying don’t buy, just think about what you have already, before making the purchase. After all you can always use what you don’t spend on papers to get yourself that die or stamp or piece of equipment you have had your eye on.  

Next I will be tidying my stamps and then my dies. I love the fact that while I am tidying I often get waylaid with an idea that I have to try out, so the inspiration and love of crafting takes over. This brings me nicely to my decision to have “Using your Stash and Scraps”as my theme for May blogs. 

When I am low on inspiration I check out Pinterest and YouTube for ideas . Like I have said previously most of my projects are not new although I often alter or add twists to items I am making. I try to give credit to those that have taken the time and effort to share their makes on YouTube and Pinterest, and where possible I will add a link to their video’s so you can see how to construct the card or project more easily. 

Look out for my updates on my tidy ups as well as the new posts in May. 

Happy Crafting

Dee

Update- The Anna Griffin pad has sold and my stamp tidy up has started with new items going on Ebay today.


Saturday 23 April 2022

Spring Flowers - White Flowers for card making

 April Flowers

No 5 White flowers for White Cards

I love the clean finish and look to white on white cards and so the last make for April Spring Flowers are these white flowers made from Heartfelt Creations stamp and dies.


I have several flower sets from Heartfelt Creations and go back to them times and time again. With the matching dies in the same cluster as the stamps, multiple petals can be stamped and die cut together. Making the process quicker. 
For this card I set out to emphasise the white flower and make it as striking as possible in a subtle way.
The flower petals were stamped using  Perfect Medium by Ranger and then pearlised white embossing powder sprinkled on. I then used my heat gun to heat the powder and get the pearlised finish. 
Once the petals have been die cut I then used my ball-tools to shape and crinkle the edges before placing them together. 

Naturally I made a few flowers at the same time and even make some coloured flowers while I had the ink pads, dies and stamps out.

The first card I made was an A5 card with white card (A4 folded in half) with a layer of gold mirror card 20cm x 14cm and the topper card 19cm x 13cm.
Onto the topper card I scored lines through the centre of the card from top to bottom. Next I took some light green narrow ribbon and cut 6 lengths, tied the top together, added a white bow below the tied section .
I then used my hot glue gun to lay the ribbon onto the topper and added the 2 flowers to cover the top of the ribbon. 


This was finished with a Happy Birthday topper added with dimensional stickers 
I love the clean simple look of this card and will be using the idea again.

Here are the other flowers made at the same time and added to my stash.


As you can see these have had stamens and different centres added and the coloured flowers have been stamped out using Adirondack ink pad. 

Back soon with the May theme, not sure whether to make May:-

Small gifts.  Or

Using your Scraps 

Keep looking back to check out what has been inspiring me. 


Dee

Wednesday 20 April 2022

Spring Flowers No4

April Flowers No 4

Kusudama Flowers 

So here we are with our fourth flower for April, the origami flower Kusudama. This is a very easy origami fold pattern but to make it even easier to follow I am attaching the YouTube Instructions I used when making the flowers below.


To make the three flowers shown above you will need 15 squares of paper 4” x 4” 
3 sticks for the stems ( I used kebab sticks) 
Decorative beads for the centre 
Hot Glue Gun
My flowers were made from 3 sheets of 12 x 12 from Sara’s Signature paper pad, “Vintage Diary”. I bought a couple of these pads when they were on offer and they were a great buy, 48 sheets of double sided papers for around £10.
Although a little heavy at 180gsm they were not too difficult to use as the folds are fairly basic on this design.
Each flower is made up of 5 petals each made the same way:

https://youtu.be/NcVjCuJG26c 

This YouTube tutorial from Origami 4ik really is the simplest version I have seen and easy to follow 

I use the pattern side of the 4” squares for 10 of the petals and the plain side for 5 so that there was a contrast on one of my flowers .

Once the folding was complete I glued the petals together then placed four of the petals together with hot glue before gluing the stick in the centre and placing the last petal over the stick and attaching to petals either side.

TIP
After gluing the individual petals together place 5 of them around to form the flower head and get a feel for the positioning before gluing the petals together around the stem. It helps you find the right place for the glue and positioning of the stem.

Make as many of the flowers as you want for your bunch. 

I have made many of these in the past and as I have no particular use for these, I just made 3 to show the flowers off. 


They can be made from book pages and sheet music for the vintage/recycled look. 


As you can see I have found a place on the window ledge to display these.

Hope you have a go at making them and as usual I would love to see yours.

Dee


Thursday 14 April 2022

Spring Flowers 3

 April Spring Flowers 3

Felt Flowers 


Another style of flowers that I love to make as it combines making flowers and felting. 
Todays flower is a Pansy. 


To make this you will need :
Felt  colour of your choice 
Heartfelt stamp and die You can cut your flower of choice from a template or flower die
Felting wool  in the colours you want to add  for the centres
Leaf felt and felting wool 
Felting needle and foam

I cut out the pansy shape by stamping directly onto the yellow felt with black ink and then cutting around the stamped images with scissors
I then chose brown and cinnamon felting wool for the middle and layering the 2 sets of petals together I put the brown felting wool in the centre and proceeded to punch the needle all over, remembering to remove the petals every so often the to stop them adhering to the foam. 

I then repeated the process for the cinnamon wool centre. 

For the single bloom below I could add a pin to the back and be ready to go 


But if you want to make a fuller brooch or corsage, join a couple of flower heads together and some leaves. Smaller flowers work well for this.

You could also add the larger flower to the centre and smaller flowers either side with smaller leaves sewn to ribbon or cord for a bohemian necklace, or added to lace for a wrist corsage.

I decided to make the smaller flowers into a brooch and added the leaves to the back, Once felted onto the back of the flower I twisted the felt around and left it for a while to add some movement to them. 


Back soon with more flowers 

Dee


Sunday 10 April 2022

Spring Flowers 2

 Aprils’s Spring Flowers 

Ribbon Flower 1

This flower is one of my all-time favourite. Not too difficult to make and with a lovely finish.


To see how to make this style of flower check out the video tutorial below from a great YouTube video by Elysia. 

The video is just over 6 minutes and takes you through the whole process to make the flower 

Having put sewn the three layer and put it together I used this beautiful jewellery to decorate the centre which I had purchased from AliExpress. I actually have the same decoration as Elysia used in her video and had I used a more pastel colour ribbon I would have used the pearl centre too. 

Next I backed the flower with a felt circle and this will allow me to use the flower as a brooch, a hair-clip or to sew onto a bag or wrist corsage. 

I made a new one the other night in the colours of the flag of Ukraine to go to a fund raiser.


Check back soon for more spring flowers 

Dee  


Wednesday 6 April 2022

Spring has Sprung So here are the Flowers

Spring Flowers

So April is going to be all about flowers to celebrate the season, and the little bit of sunshine we have enjoyed so far.

I love to make flowers from any medium, paper, organza, cotton felt etc, so during April I will be showing you a selection of my favourite makes. 

Starting with Paper.


This spray is a selection of paper roses cut by hand, leaves made with dies and a bower of buds made from  tissue.

The Roses: Start by cutting a circle from paper (the colour of your choice) the circle should be between 4” and 6” diameter. I do not use a die for this just cut by hand.  
Next from any part of the outside edge start cutting about 3/4” in all the way around and keep going into the centre leaving a 3/4” circle in the centre 

Go over this cut making a wave along the outside edge 
Then from the outside edge roll the cut section around until you get to the centre circle, not too tight but a definite roll (as if you were winding up a roll of ribbon or tape measure). When you get to the centre settle your rolled paper onto the circle and let it spring out a little before hot gluing the it down. 

The Leaves: Gather a couple of leaf dies and cut them out in multiples so you can build them up. This is best done in a couple of different greens to add interest to the colour background.

Bower:
For this you will need 2 ply kitchen or toilet tissue,  floral wires, and flower stem tape. 
To see how the buds and flowers are made click on the link below 


This is a great tutorial and shows you how to make 7 different tissue flowers that can be used to add a lovely soft addition to a paper flower display. I made a great display for my lounge and the beauty is you can match the tissue colour to your room colour. 

For this spray I have just used white tissue. 


Once you have your flowers assembled lay them on your craft table and play with how you want to display them. It is worth taking the time to do this as the results are always more pleasing than just gluing together hoping for the best. 
I started with the leaves laid out and hot glued the end of the leaves together and this left the outside of the leaves free flowing.


Next I laid a line of hot glue down the centre of the assembled leaves in a bower shape and laid the bower onto the glue. Make sure the line of glue is not too thick and just one line so that not too much is showing either side


Last lay the roses over the centre of the bower covering any glue and nestling the roses against the bower side. Add roses in a cluster on both sides of the bower, for the best effect. 


This makes a great table decoration, I would place one each end of the table leaving the centre free for all the dishes or work apparatus required. They could also be used to decorate the backs of chairs, shelves for displays etc.

Happy Crafting
Dee