Followers
Friday, 27 January 2023
CARD WITH FRAME
Wednesday, 25 January 2023
Valentines Table Card
Self Closing Envelope
For Valentines Day
Saturday, 21 January 2023
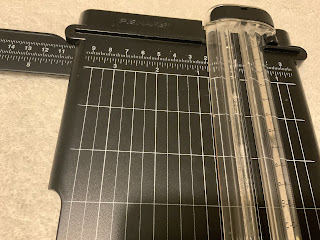
Paper Trimmer Challenge
Fiskars V Firbon
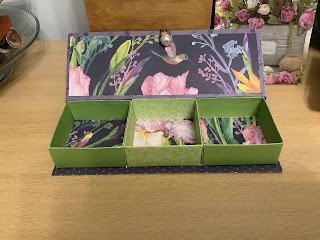
You can see from the pictures I have adjusted the Firbon project slightly making it a little narrower, as the one I made first with the Fiskars cutter, on this one the base section of the box was wide allowing the pockets to fall, making it difficult for it to stand up straight, It will probably be better when filled but I thought a narrower base would work just as well.
Tuesday, 17 January 2023
3 Box ~ Gift Box
First New Project of 2023
1 bead and small piece of coordinating ribbon
From 3 sheets cut to 9 x 9 save the outer pieces to line the boxes
Score each of the 4 sides at ½”, 1 ¾”, 3”
Make into a box by gluing the 3 middle section on the left and right side ( not the corner squares). Lift up and put the 2 1.5” sections together and the 0.5” section glued to the centre square. Next glue the underneath sections of the square coroners and the top card of the 3 sections. Fold the corners in and fold over the the other section with the top 0.5” section secured to the centre square.
With
the 4th sheet cut to 9 ½”, x
12 again save the strip for strengthening the back section
Score
this at 3 3/8th”, 4 5/8”, 8”, - cut at 11 3/8”
Cut
the saved strip down to 2 ¼” and score the length at 1 1/8”.
Fold
all the scored lines and fold over and glue down the top two section to make a
firm base. You may need to trim the far edge to make it fit inside the score
line. This leaves the base of the box with a bottom side and top,
·
Glue
the folded 1 1/8” strip and glue to the inside of the back of the box, line up
the piece inside the score lines, butting it up to the top edge, and folding
the lid over to make sure there is a snug fit and the lid sits down. Cut the
excess off.
·
Next,
sit the 3 boxes on the base and make the sides even, glue the base and the top and right side of
2 of the boxes. Lay them on the base and from the left side place the boxes
together on the base with the top edge glued to the back panel and the side
edge to the second box.
·
With
the third box glue the base and top edge and complete the 3 boxes on the base, clip
the boxes together while the glue dries and fold the lid back and clip the
boxes while drying.
·
From
your scraps cut 2 panels to line the lid, inside and outside, these should be
3” x 9”. Thread your ribbon through the bead and attach with tape to the inside
of the top panel. Glue the 2 panels down .
And here you have a lovely gift box ready that will set off any present .
I have put some makeup pieces in but you could add hair adornments, sewing tool, chocolates, jewellery etc
The whole box cost approximately £1.50 to make and that was mainly the pearl bead as it was a more expensive jewellery bead. The card used was from a pad purchased in the range and the 12 x 12 sheets were cut to show off the humming birds on the inside and outside panels of the lid.
Hope you liked this project
Happy Crafting
Dee
Tuesday, 10 January 2023
New Year - Recycling
First Blog of 2023
Recycling your Christmas Papers
So by now we have all taken down our Christmas decorations, Christmas cards and packed away our gift bags and wrapping that the goodies came in. But don’t let it all sit in the cupboards for 12 months, lets start now to re-use and re-cycle some of these items and then store them away.
My cards sat perfectly in the box and I had a set of notelets made from the calendar that I would normally have binned.
Now glue the outer sections of the square and the inside of the top and bottom panels, folding the 2 1.5” sections over the glued squares and lining the inner square with the 1/2” panel


