Followers

Sunday 23 December 2018

Happy Christmas - Last post before the big day

Hi Crafters

Just want to say a big


HAPPY CHRISTMAS 

to everyone and

HAVE A GREAT NEW YEAR WITH LOTS OF LOVING CRAFTING 

Back in the new year with lots of lovely ideas for Valentines and Mothers Day 
Boxes
Flowers
Decorations etc

I will leave you with a picture of my presents on the sofa, ready for distribution


Dee

Christmas Decorations & Gift Wrap Idea IV

Hi Crafters

As I am checking out YouTube for ideas to wrap presents I found more styles of stars/snowflakes, and being the avid crafter I am, I find I have to give them a try

The other evening I saw a large star made from napkins and hot glue gun. The following day I put the glue gun on having found some appropriate napkins, but needed to go back on YouTube for a reminder. I found the original napkin star but also another one I was drawn too. The original napkin decoration looked more like a spinning spiral when finished, so I decided to try the other star instead.

It works with Napkins, papers and light card

Here it is made from napkins

All I have added is a 5 pointed star to the centre and a pearl embellishment. It is a little soft but if I had a wall to hang it against I would definitely use it.

The next one is made from some light card squares I had, I thought I would need to use 6 sheets of 6" squares, but in the end only needed 5, which I found out by mistake as I had already used one of the squares in the pattern I chose and only had 5 left.

  
This is a simple and effective star and you can make them as big or small as you like if  you make them bigger than 6" squares you may need to add extra papers to make the star full enough to come together well.

Take a square and fold diagonally turn and fold the other diagonal 
Next turn over the paper and pull the corner into the middle lining up on the scored lines for accuracy. Do the other side the same.


Now fold the sides into the middle on both sides and then fold together so you have a valley and mountain folds across the shape, fold in half length-ways 


Glue the centre as shown in the picture with pencil lines using a wet glue
Turn the piece over to the side that has the first slope running from the right to the left side and cut as shown. The cut should line up with the turn on the left and cut through to the left top point.


Do all five pieces the same and then lay on top of each other gluing in the same way as before, just on the white bottom section. This makes a lovely star that can be used as it is or thread a large bell on some ribbon and tie once then thread the ribbon through the centre of the star. 
On the one in the picture above I had added thin silver elastic from Berisford. This makes the star re-usable. 

Happy Crafting 
Dee

Friday 21 December 2018

Gift Wrap Ideas III

Hi Crafters

As promised more gift wraps ideas.


This is a simply wrapped parcel with ribbon

Start by turning the box over wrapping the ribbon around length-ways then turn the box over and tie into a bow. Add another piece of ribbon with a bell in the middle and tie into a bow this will give you  a smart double bow with a bell centre.


Here is another parcel wrapped and ribbon around the parcel. Using another piece of the same paper about 12 inches long and wide enough to sit inside the width of the parcel fold the paper back and forward (valley and mountain folds) down the length and then fold in half, crease well.

Unfold, add some double sided tape to one side.
Before placing it onto the parcel add a length of ribbon around the middle, then stick down. Put double side tape to one side of the top.
Pull both sides up to meet the middle and make the fan shape stick together
You now have the ribbon already in place to tie into a bow and finish the decoration.

Happy wrapping
Dee

Gift Wrap II

Hi Crafters

Last minute wrapping so here is an idea for  decorating a wine box, although the decorations could just as easily be used on any box if you adjust the embellishments to the appropriate size.  If the recipient is lucky the bottle will be champagne, in which case it may well come in a box, but if not you can make one using your score board and instructions from Crafters Companion wine bottle box on YouTube. Sorry but I do not have the time to go through this process now, maybe in the new year.

I have used this for items other than wine, such as candles, large body creams etc, and here are a few ideas to make it special, using the stars that were used to make the wreath (see Star Wreath posted 30th November, Day 12 of the 12 Days of Gifts)


This one has a simple cut-out of a family of Polar bears around the top and then a star (sorry you can hardly see it) with beads and pearl drop

Next we have a cut-out star This is cut from a die recently purchased, you cut 2 and place together,  the lazer pattern makes it quite striking.

You may be able to see I have adjusted the size slightly for this box. The polar bear family are back and the star has beads dangling.

The next box has been made from wallpaper. I like to use recycled papers if possible and this wall paper has a lovely modern colour with a traditional print. It is not a  Christmas theme, so can be used all year round. 

The stars were made from some papers that colour-match and a silver bell added to the top. I think I may well add some beads to the centre of the stars for added bling before use.

Back soon with some more gift wrapping ideas.

Dee

Saturday 15 December 2018

Christmas Wrapping 1

Hi Crafters

Most of the Christmas shopping is done and now is the lovely job of wrapping parcels ready to give out on Christmas Day

I love this time of year, its wet and cold outside and you can wallow in the warmth at home wrapping parcels and drinking hot chocolate.

I am still learning a lot about different wrapping processes, and find it easier if everything has a box.

So here is my first style of wrapping


I have chosen 2 coordinating 12 x 12 sheets of card and made a box to fit the gift with about 1cm spare all around
If you have a box maker it is simple, if not simply start with the same size card for top and bottom and then score all four sides 1mm less on one sheet to the other

So the item inside this box was 11.5cm high by just under 9cm wide
So I scores 9cm on all four sides for the bottom and 8.9cm on all four sides for the top.

And added the ribbon bow (wrapped around the box in red) and just a box in the green ribbon.

 Next I will be making some ribbon poinsettia decorations for the bigger boxes. I like to make these and add elastic to them so the can be slipped over the parcel and then when the gift has been opened the poinsettia can be rescued and reused. There is so much ribbon thrown away each year I am going to try making some recyclable bags for Christmas for immediate family that can be used each year.

Not sure if I will make them in time for this year. But I will keep you posted

Dee

Late Advent Calendar

Hi Crafters

For any of you who joined in at the 3 Crafts Day at North Petherton, you will have made A Favour with me. Having made one we added a mint chocolate as a treat to give to anyone visiting or to have with coffee. Another idea shared at the time, was to use small favours made in this way to make an Advent Calendar.

As I was out and about a few days later and saw some pretty number stickers I thought I would have a go.


This was a very simple make, recycling a cereal box.
Happily hubby eats the cereal and I get the card.
Using the front and one side panel of the box I trimmed and covered in a Christmas Red paper. The back was covered in a green paper. and then I just popped on 24 favours with the numbers on. It really needed weighing down a bit more at the base as it has a tendency to flip over.

Needless to say  hubby has eaten up to about day 20 already but as he gave me the card I cannot really complain. It also saved me picking up the chocolates and putting them back in the numbers Perhaps next year I will do another with a bit more attention to detail and some chocolates he really likes, and that way they It will be all over by the 5th of December.

Happy Crafting
Dee 


Tuesday 11 December 2018

Craft Days for 2019

Hi Crafters 

Well here we are and I hope you are all ready to post your Christmas Cards. I sent mine on Monday and now I have only the hand delivered ones to do. I need about 50 cards and I am happy to say all were hand crafted by me this year. The very first year that has happened and it is a great feeling. 

So here I am looking at ways to decorate my presents and planning Craft Days for next year.

I have managed to book 2 dates.

Here are the details for the first date


Flowers for All Occasions
 Paper, Ribbon & Foam

Saturday 16th February 2019PAWLETT VILLAGE HALL – 10am – 3.30pm We will make: Flowers from paper – just using scissors and glueShape and build flowers from foamStamps and die-cut flowers to decorate cards and boxes There will also be demonstrations on how to make a ribbon flowerAnd how to make an organza flower Lots of lovely tips and ideas shared In the afternoon you will make a plain box and a Tuxedo card and decorate with your flowers


These flowers are not shaped to allow them to fold flat for posting, but for decorating boxes and making your own embellishments we will learn how to shape and mould paper and card to give a more natural look to your flowers.

Please contact me for more information and booking form  

Denise


Monday 10 December 2018

Christmas Craft Shows 2018

Hi Crafters

It has been a while since my last post as I had much to catch up with after the 12 Days of Christmas Cards and 12 Days of Christmas Gifts.

As you know during November I also did 2 Christmas Craft Fairs and I said I would let you know what went well and what did not.

At the first fair I was not prepared for the high spec of the stalls and buyers. The show  had good footfall and buyers were looking for gifts to  buy, my items were selling at £2-£3 and I think they were actually not the price range being sought for presents by buyers attending. This is a lesson in knowing your fairs and potential customers as the only items I had over £5 were 2 lovely wreaths that I did not present properly and consequently did not get seen until near the end of the show when I made room for them on the table. I then heard a lady say "I wish I had seen that earlier as I have spent out." Her friend had also run out of cash and therefore I was unable to make a sale.

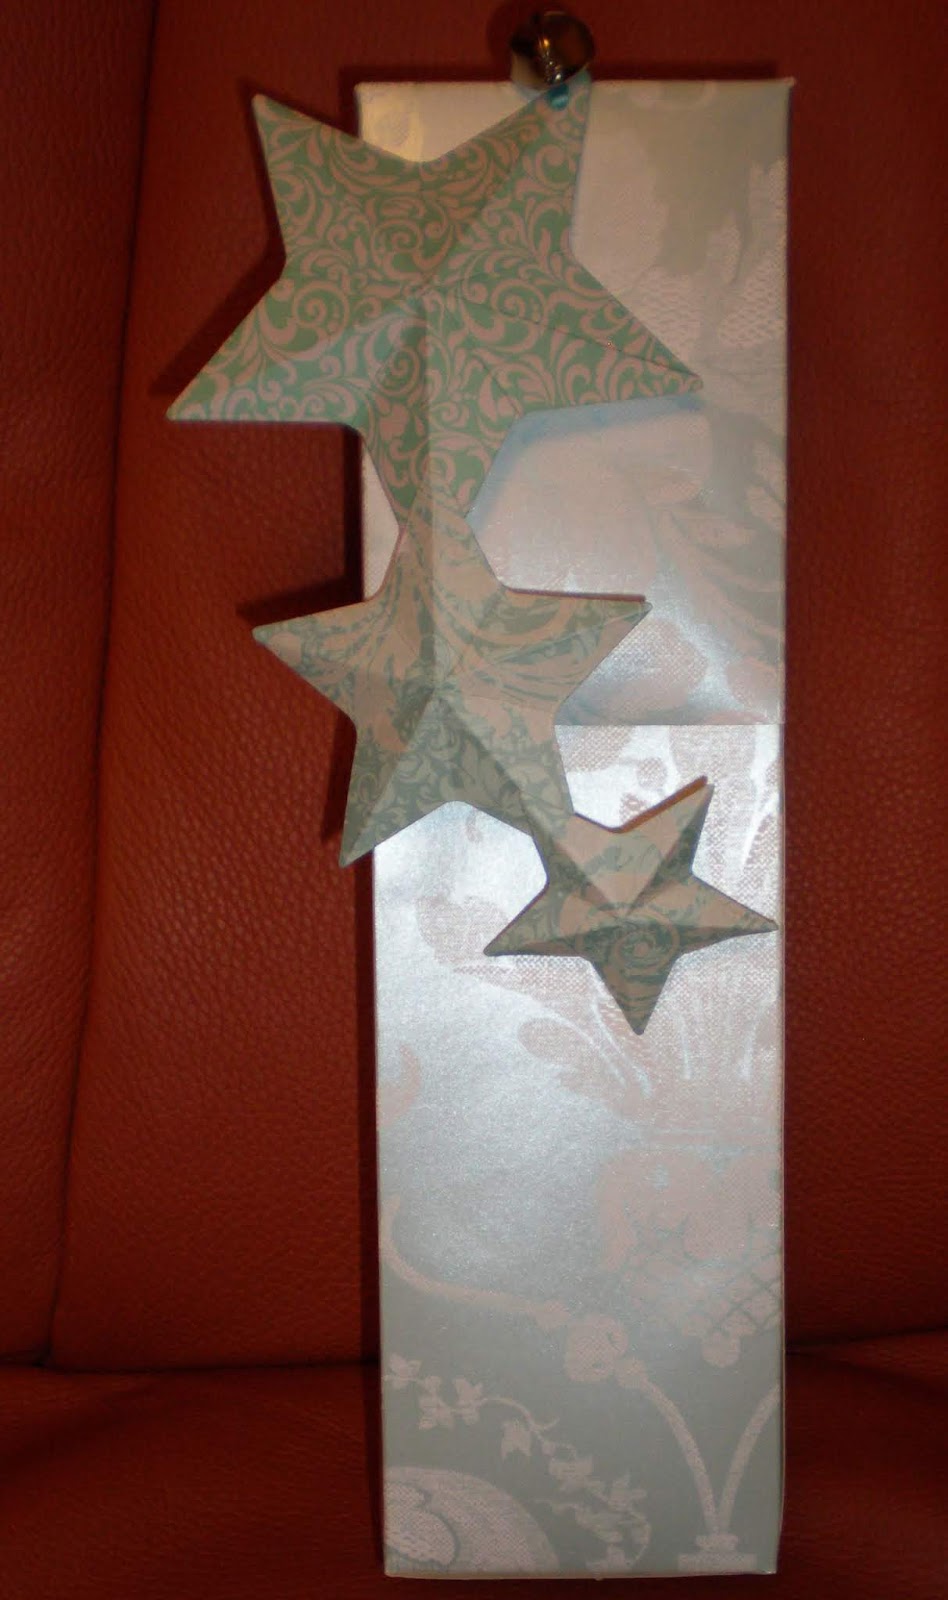
So these customers were not looking for stocking fillers and this was the bulk of my items. However I did sell stars and star cards very well, as I was able to engage with people, explain my design concept and the way the star card worked. So I sold the decorative stars and the star cards. I did sell a couple of packs of decorated paperclips, some gift boxes, but very few of the small items.

I also had an opportunity to talk to other stall holders and one in particular  was very helpful, having attended this particular fair for many years he was able to pass on useful information.

In terms of actual sales I made as much as the average fair, but the cost of the table was higher, and the footfall very good so my sales should have been more. On the other side I met some lovely people, learnt a lot and will focus my attention on more specific areas for next year.

At the second fair, it was a different story altogether. My sister was selling star cards, favours and matchbooks, so I concentrated on notelet sets, gift boxes, brooches and snowflakes. The stocking filler items went well as did the enamel brooches, (I do not make these so they would not be appropriate for Craft Fairs but this was a Christmas Fair). The wallet stationary sets went very well.  Again I chatted to people some ladies took my details for workshops so it was a good day all round. This fair is only on in the morning so in terms of sales was very good .

If you want to make money at craft fairs then paper goods are a difficult sell, I love to attend fairs and sell at them, to clear items made and make room in the craft room. As I craft for a hobby I do not want to make lots and lots of the same thing, rather I want to make whatever is new and fun to try. This is not a business approach and therefore I cannot expect to sell lots. But as long I cover costs and make a little toward my next craft buy, I am a happy crafter. So far my Christmas Fairs have been kind to me and enjoyable. If you want to try fairs to make room or make money for your craft or charity, check out YouTube for lots of advice and ideas and be prepared to have a learning curve.

One of the ideas I use each year is a trial layout of my stall. You are given the measurement of the table you have booked and it is a good idea to  measure the size out and lay out your items. Try to get height at the back so that visibility is good
Here is my layout for this year.

You can see the ribbon marking out the table size and in the front you can see the start of the star wreaths that did not fit, and which I hung on the front of the table where no-one saw it. 

I have stands that sit at the back of the table 
But still feel I put too much on the table and must learn to be leaner with spare items stored underneath, as this will allow items to be seen more clearly. 

Back soon with details of Craft Days booked for 2019

Happy Crafting 
Dee 


Friday 30 November 2018

12 Days of Christmas Gifts - Day 12 - Star Wreath

Dear Crafters

Well here we are Day 12, I never thought I would make it. The 12 Days of Cards plus the 12 Days of Gifts have taken up a great deal of crafting time over the past 2 months. I have enjoyed sharing all the projects with you, and hope you have been able to use some of the ideas for your Christmas crafting.

Today's project is one to brighten up the home. I saw the idea on YouTube with the 3D stars and they are so easy to make I had to have a go. I now use them for wreaths and decorative gift wrap.
Day 12 Christmas Star Wreath

Here is the inspiration
You will need
A 20cm wreath frame
A Hot Glue Gun
At least 3yards of ribbon to cover the frame
20 background stars and 12 - 15 top stars
The stars need to be 5 point and you could cut them by hand but for this number it is worth investing in the XCut stacking star dies for approximately £10
Buttons to match the colour of your top stars
For this Wreath my background stars are cut from the 2 largest stars in the set and took 5 sheets of A4 card in red
The top stars were cut from the two largest dies and took 2 sheets of 12 x 12 card from a Christmas First Edition stack

Here is the exact set I used but you may have some dies in your stash just as suitable, provided they are 5 point stars they will work.

Wrap the wire wreath in your ribbon - literally wrap around with no gaps between the ribbon. You will not need to secure it at this stage
When you have covered the whole ring glue the end down and take a piece of cord or ribbon, tied together, fold over the ring and pull through the front to make the hanger, you can cover some of the glue that fastened the ribbon base with this hanger

Using the background stars, as they are, (flat), place them around the ring on one side and using the hot glue gun secure them to the ribbon. Turn the wreath over and do the same on the other side. This gives you a colourful base.

Now select the best side to add your top stars.
With all top stars cut out you need to score on all five sides from the dip of the V to the point the opposite side. Then burnish each line and fold one point up with the one next to it and the one next to that and then the other two to make the score lines more pronounced and give 3D to the star

Here is a smaller star before and after the scoring 

 You can see the difference it makes to the shape 

Once you have scored and shaped your stars place them around the wreath base until you have them how you want them, them glue each one in position with your hot glue gun you will  need to glue inside the rim of the star and gently squeeze down to attach them. I found one large and one the next size down all around the wreath worked best but you may want to mix it up with some smaller stars, there are no hard rules.

Once them are firmly in place select you buttons or embellishments and hot glue them to the centre of the star. 

If you are going to add a bow to the top or bottom remember to leave a little space when placing the stars.

Here is one I made using coloured paper from a basic paper pad. 


If you try this wreath I would love to see some pictures 

Check back soon when I will  be talking about the 2 Christmas Fairs I attended, what worked, and tips I picked up from the Fair and other traders.

Happy Crafting 
Dee

Wednesday 28 November 2018

12 Days of Christmas Gifts - Day 11 - Concertina File

Hi Crafters

Today is another day of crafting with my own design. There are many folders and files out there so I have not invented or designed the basic concept but I did adjust this from instructions that used A3 card to one that can be made from 12 x 12 papers, as this makes it more accessible to most crafters. 
Once you have made the file you can fill it to gift a friend or colleague or to say "Thank You"
Also ideal to keep in the closet as a last minute present 
I have filled these with:
Stationary - pads and notelets
Greeting Cards 
Recipes 
But let your imagination go wild

Day 11 - Concertina File


For This you will need:


2 sheets 12 x 12 papers (preferably double sided) cut 4" off each piece
Fasteners, magnets or Ribbon to secure the file

Piece one 8” x 12”  Forms the base of the folder
Score ½” either side
Turn and score at 4”, 5.5”

Piece 2 cut to 7” wide and 8"long  forms the flap of the folder

Turn and score at  3” and 3.5"


Fold over the side flaps and glue slipping in the top flap from the top of the base to the 3" score line 


Take the 2  x 4" strips and score at every inch along the length fold this mountain and valley style to form the sides of the file
At the bottom of the file the section 4" deep, glue a folded side panel to the folded section on each side of the file. You will now have a concertina file  


Now for the fastening
You can use plastic poppers if you have the tools
Magnets you will need a large heavy duty magnet
A belly band from 2 strips of card joined and decorated 
Or the simplest way is to Glue pretty ribbon to the middle of the back and base, that can be tied to close the file.


Here is one using a belly band 

And here is one using Ribbon
  

As you can see I make them quite often as they are useful for filing and storing all sorts of items.
I have just made one for my sister to store her die-cuts and with the different sections you can categorise the different die-cuts ready for use, a lovely gift for someone just starting out with paper-crafting.

Happy Crafting 
Dee


Friday 23 November 2018

12 Days of Christmas Gifts - Day 10 - Mini Photo/Brag Book

Hi Crafters

Today's Gift Idea is often called a brag book as it makes a lovely gift for a new Gran or Mum, who can add small photographs to the book and it will pop into a pocket or handbag to be able to share the joy with friends and colleagues. But it can also be used for notes, lists and photographs, and decorated with a specific person in mind.

The one I am showing today is a Christmas Theme and it would be great for shopping lists, Photographs of items you see of decorations when out and about and of course cuttings from magazines to remind you of the exact present requested.

Day 10 

Mini Photo/Brag book


You will need 

I piece of 12 x 12 heavy paper
Matching toppers and card to decorate in the theme of your choice
1 piece of matching ribbon approximately 12" 
Narrow heavy duty double sided tape
Pritt Stick

Fold the 12 x 12 sheet in half and then each side into the middle so it is in 4 equal sections 
Turn and score in half and each side at 4cm.  Fold over the 4cm sections


In the centre line you have just scored  cut up through the first 3 sections leaving the fourth section attached 


Starting from the right side fold the sections valley and mountain folds when you get to the end fold the top down and repeat for the other side 


The book will come together with a middle section that needs to be glued together 


Glue the middle section with your Pritt Stick and attach narrow double sided tape to the outside edges of the flaps and to the 2 centre flaps that you can see clearly in the picture above. 

Run a line of glue around the middle of the outside sections and place your ribbon over, then glue a decorative piece of card or topper over the top to secure the ribbon and decorate the book's front and back 
Add little decorations to the inside panels and a selection of tags/lists and embellishments to each section 


Other ideas for recipients are wine lovers with lists for REd, White Sparkling wine that they like 
Steam Punk or Train theme for budding or retired engineers
Seaside and sailing for holiday photographs etc
Cooking theme with recipes 
Gardening theme with seeds

Hope this has given you some inspiration

Happy Crafting
Dee

Wednesday 21 November 2018

12 Days of Christmas - Day 9 - Mini Box & card Set


Hi Crafters

Today we have one of my own designs 
The idea was morphed from an Index Box I have made. 
We make the box and cover it and then add 6  of the 3" cards and envelopes inside as a pretty  and useful gift. You could add some tags as well if you wished or a small covered notepad 


Required

I piece of card, preferably double sided 16cm x 30cm
I piece of pretty paper to cover 1  12 x 12 or 2 A4
6 x  3” square cards and envelopes

Score base card at 10cm,13cm,23cm,26cm
Turn and score at 3cm either side

Cut out top side panels and cut notches at the 2 panel sections
Before making up the box


Cut panels to cover the base box from the papers
Cut panels 9.5cm wide and from these
Cut 2 9.5cm squares
5 strips 9.5 x 2.7cm
2 pieces 9.5cm x 4cm these require the corner punch

When layering the front panel place a small magnet under the paper
When covering the inside flap place the other magnet to match up
You can do this by layering the magnet use a pen to draw on the outside of the magnet and then bring the flap over so it marks the card. Glue the second magnet to the ink mark and cover with the paper panel.

Use the remaining papers to cut 6 panels 7cm square to cover the cards so you have a matching gift set of cards, envelopes and box.


 These can be made to give at any time of year
For the Christmas box here I have used some pretty Tilda Nostalgia Christmas Papers, But I also made a box with First Edition Christmas paper pad and as it was much plainer cardstock I added a pretty red flower to the front of the box.

Tip:
If you have not used magnets before and cannot source them easily, add a length of matching ribbon by gluing it to the back ,top and bottom panel of the box before you add the paper panels. You will need approx 60cm.
I will definitely be making them for spring gifts.

Happy Crafting 
Dee 


Sunday 18 November 2018

12 Days of Christmas Gifts - Day 8 - Matchbook

Hi Crafters

Today is a simple gift
A stocking filler or handbag present

They can be made quickly and easily if you have a mountain of colleagues that you would like to acknowledge for the holiday season.

It is based on the old matchbooks everyone had in their pockets or purses.These can be made any size, but I will give you measurements for the one I am showing in the pictures


You will need

1 piece of card 22cm x 7.5cm preferably double sided or cut a piece of paper 1/5cm smaller all round to match and line the inside
stapler
Paper to make notebook
decorations to match your card


  1. Score the card at 4cm and 14cm, remember to check the pattern flow on your card the 4cm flap is the base of the matchbook and folds back up while the top will fold down
  2.  Fold the 4cm fold up to form the base and staple near the bottom edge. Put the staples so the smooth side of the staple is on the back of the matchbook and the folded part of the staple is on the front. This way you can cover up any sharp edges with your embellishment.
  3. Next cut some lined papers 6cm wide and 17cm long, fold in half and staple the middle  


  • Decorate the front as you choose this could be with toppers or die-cuts and cover the staples with one of your decorations. As you can see I have used a paper bow for this. 
  • Slide the paper pack into the matchbook under the flap 
  • Cut the top corners with your corner punch (or scissors). The front cover will tuck inside the flap and hold the notepaper in place. 

And here you have a little gift made in a moment
Notes: You could add Sticky Notes instead of papers and for this you just have to make the width and length adjustment to hold the pad of Sticky Notes.. Still give a 4cm flap and allow enough card for the top section to be 2cm shorter than the base panel as this is enough to tuck in.For example if your sticky note pad was 6cm x 6cm the card strip would need to be 7cm wide by 18cm long (4+8+6) scored at 4cm and 12cm. 
 

Happy Crafting 
Dee


Saturday 17 November 2018

12 Days of Christmas Gifts - Day 7 Photo/Journal

Hi Crafters

This project is great for using up the ends of ends of your paper pads and when finished make pretty gifts for friends and family

The inspiration for this came from Lyriclover on YouTube, check out her items for Christmas 2017 Christmas Craft Fairs.


You will need:
at least 8 sheets of 12 x 12 papers preferably double sided
Plain white or cream card to make the photo mats
coordinating decorations for the pages

Take 4 of the 12 x 12 sheets and and score them at 7cm from the base and then fold in half
Fold and burnish the scored lines to form for double sided pages


Choose the sides you like the most to have as the outside pages and the then select the best side for the inside pages I have put the single sided papers in the middle as the plain side will not show once they have been glued together
Stick down a narrow strip on the outside edges of the folded flaps

Layer the pages on top of each other glue the inside pages together. So in the picture shown I would glue the plain white sheet and layer the second folded sheet on top.
Do this until the 4 sheets are together and form your journal.

Decorate the flaps and make photo-mats to pop in the flaps, which will also hold journaling and memorabilia, such as ticket stubs, programmes etc

I have chosen to leave the photo-mats plain so that the photographs stand out. They can be any size provided they fit into the journal and coordinate with it.
Here are the photo-mats that are then popped into one of the pages.


As you can see I have also added a set of little round card circles as I thought these would be lovely for mini photos

All of the card stock I have used comes form a First Edition Christmas Paper Pad

I have added a strip of coordinating card to make the binder, you do this by cutting a width of card that allows cover both sides, glue well and lay half on the front of the journal. Fold over the edge allowing some room for movement ad then stick down on the back.

You could make these for Bridesmaids to collect all their memories during the run up to the wedding.
For friends or family who have a special event coming up.
With the six pages there is plenty of room for 20 or so photo-mats, notes and keepsakes.

Hope you enjoy making this and using some of your stash. It is a good way of clearing some stock to make room for new.

Happy Crafting
Dee


Friday 16 November 2018

Christmas Chaos

Hi Crafters

As you can see in my hurry to catch up  with the 12 Days of Christmas Gifts I have posted day 6 before Day 5, not sure how I did that and probably could not do it again.

But never mind we are all set at Day 6 , and I can spend today photographing and getting the next post ready. As tomorrow I am off to my next Christmas Fayre, at Winscombe, it is a morning Fayre finishing at lunchtime, so if you are in the area why not check it out. There is a very good fish & chip shop in hte village and also the Woodborough do lovely meals.

 Back on Sunday with Day 7

Happy Crafting
Denise


Thursday 15 November 2018

12 Days of Christmas Gifts - Day 5 - Photo-Card

Hi Crafters

Here we are with Day 5 of the 12 Gifts of Christmas.

This is another gift that can be made all year around, particularly good for new parents, first Christmas or Mothers Day.


Day 5 Photograph Card


You will need 2 pieces of good quality craft paper 12 x 12 cut to 11 x 11
2 coordinating heavy card stock A4 or 1 sheet A4 & 1  6 x 6 card and envelope
Take the two printed papers and cut to 11” squares and then fold into a frame shape 
See how to make this on YouTube,  'Red Ted Art' - Easy Paper Photo Frame -
As watching the video gives easy instructions

Cut 2 squares 14cm of black card to place in the middle of the frames

The piece off the end 2cm wide fold in half and cut approx. 9cm long to use as a binder for the 2 frames. You will need to cut a diagonal each end and make the length to fit so it can be placed into the recess of each side of the frame. 
Cut another piece of card 16 m x 12” and gently fold in half over the 2 frames
Or if using a 6 x 6 card place the frames inside the and 

Decorate the front of the card or cover with fabric before adding the frames to the inside
Glue the frames to the inside of the cover
You may wish to make a fold over flap to close up the photo frames in  which case cut a piece of card 6” x 5cm and score at 2.5 and 3”
Glue the short end to the back of the cover before gluing the frames inside
Use a magnet or velcro dots to hold the strap in place

As you can see my photo-card is not made with a Christmas Theme, but you can use papers and decorate according to your theme, and with photographs of friends or family these photo-cards can make special personalised gifts, great for those normally difficult to buy for.

Happy Crafting
Dee