Followers

Wednesday 26 May 2021

Concertina Book Part 2 inside pages

 Hello Again hope you are all well and enjoying your crafting.

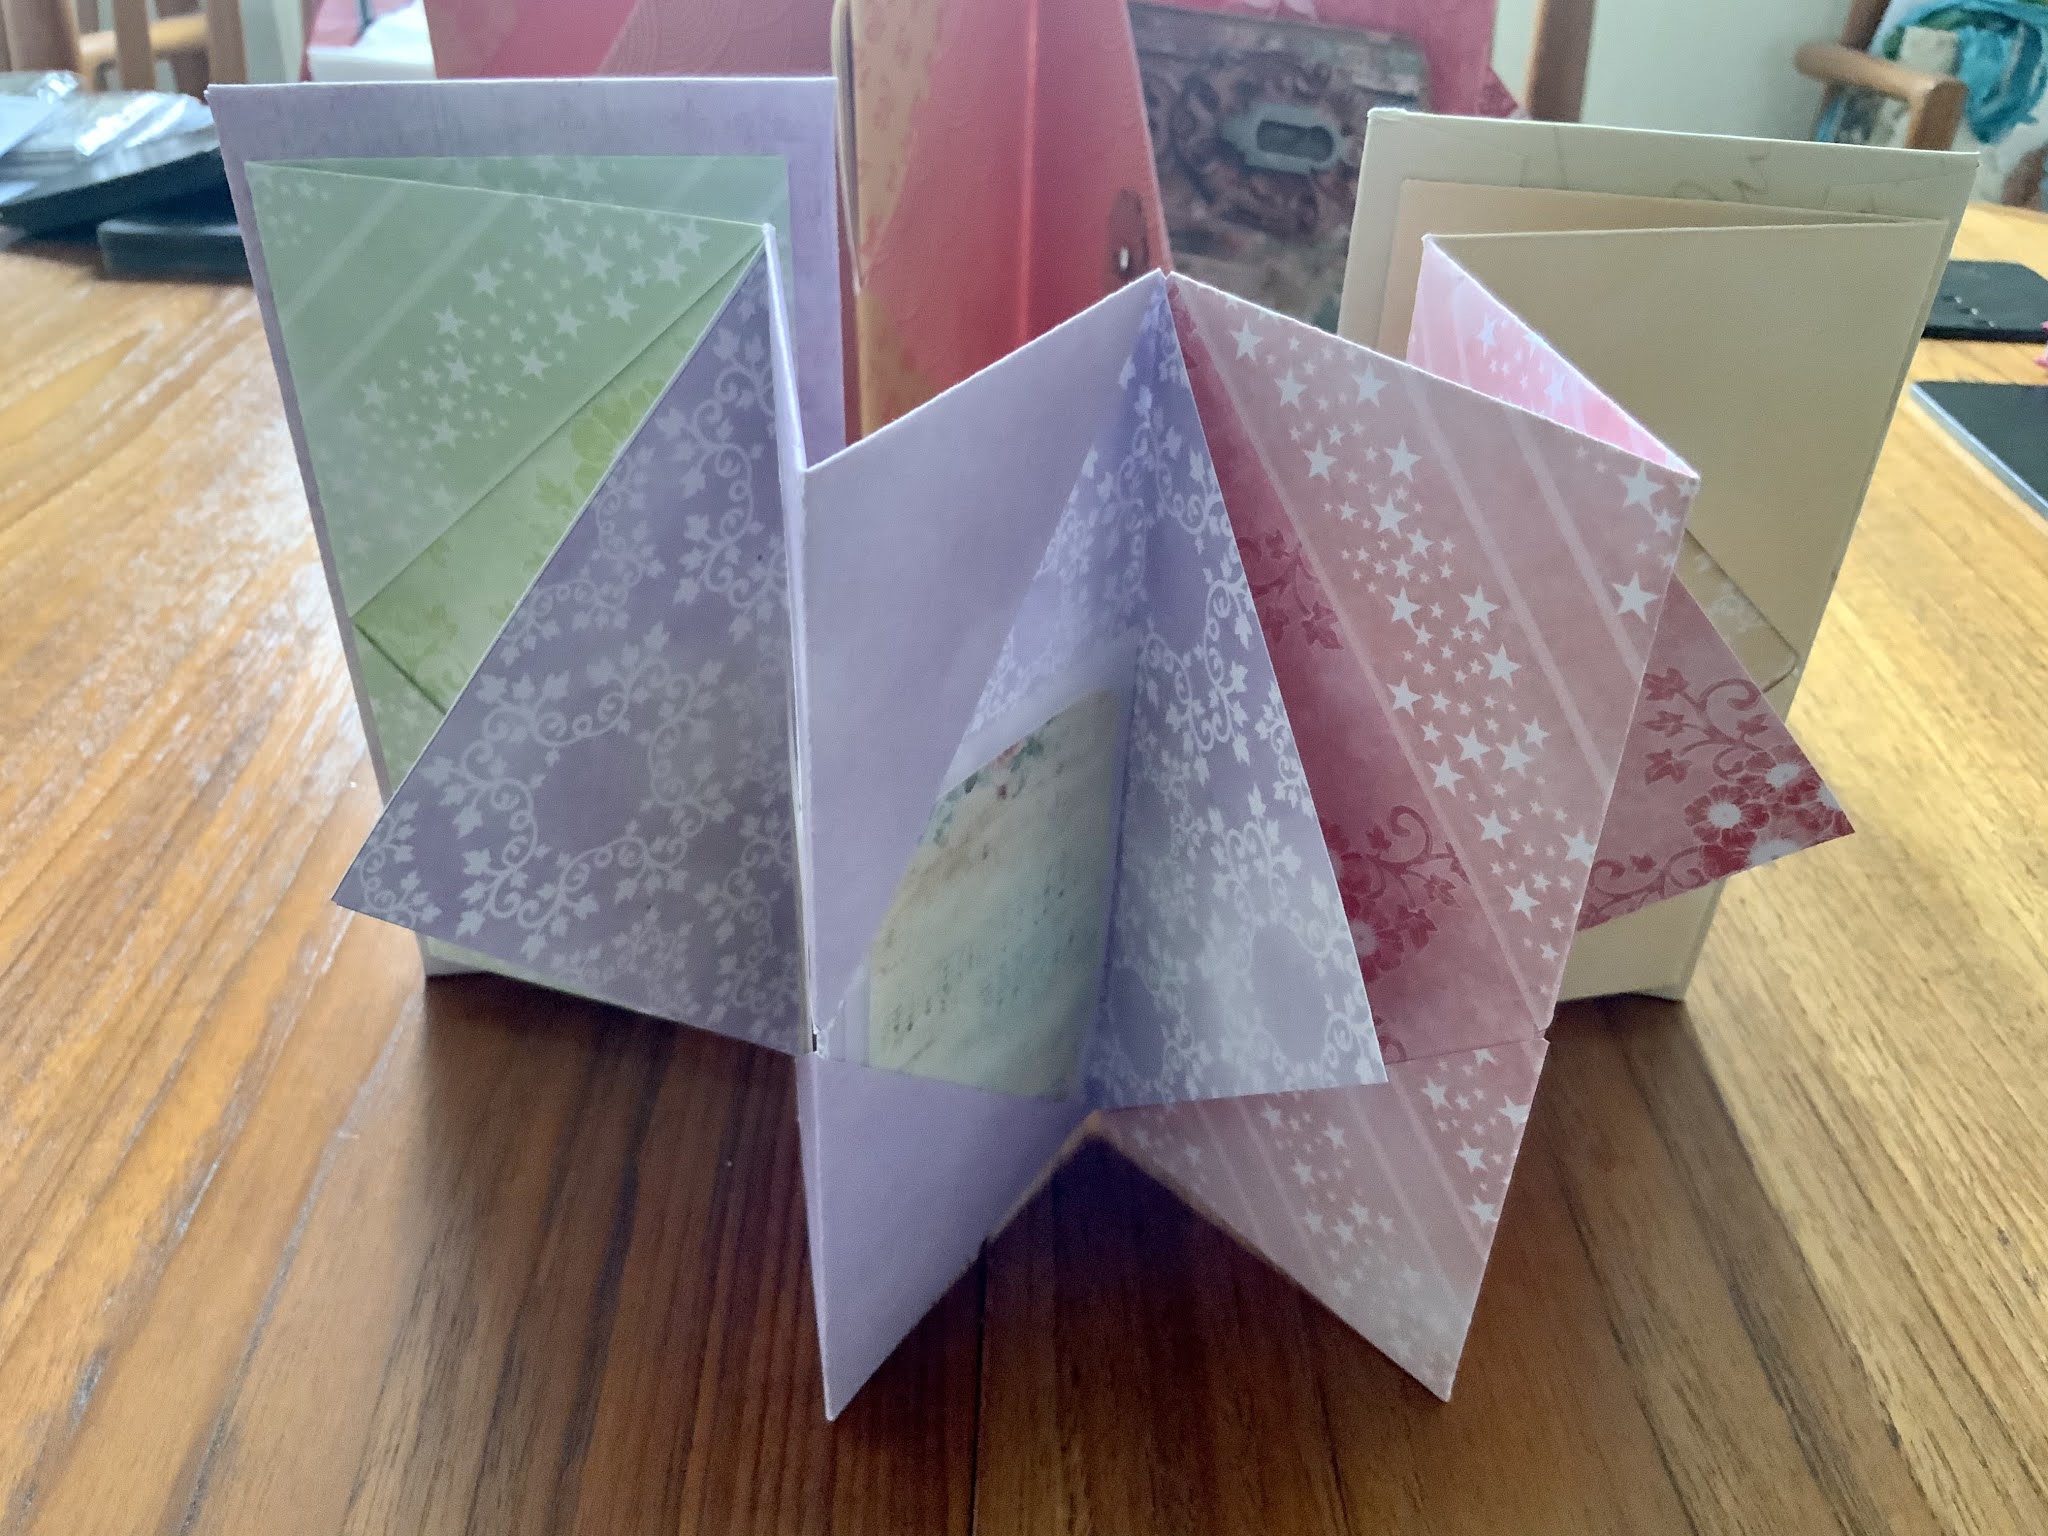
Today as promised I will show you how I have decorated the inside of my concertina book. I like to be able to use my books as journals and photo albums so this style suits me well. On the inside pages I will add some decorations and tags and then the outside panels will be left for photographs.

There are basically 4 double pages where you open out the book and I will take you through each set, but first lets see the book and front cover.


On the front cover I have added an eyelet to right side to take the ribbon closure. I have then finished the front with a glazed tile I made from one of the labels that come with the papers. To make the tile i have glued the label to a piece of heavy card stock and glazed it with Glossy Accents glue. 

Next you open the book for the inside cover and page 2.
On the inside cover I have used one of the longer strips left from cutting the pages and folded into 4 to make a small concertina booklet, and finished the top with another label. On page 2 I have tucked in a couple of tags rounded at the top 

Page 3/4
I have left page 3 with nothing tucked in to allow the picture of the bird to be seen, then fold over the kite flap and on page 4 there is a folded tag. I like to add these as they can be used to hold notelet pads or sticky-notes for jotting down information

Page 5/6           


Page 5 has another 2 tags added to the tuck-in and an embellished large Paperclip (shabby chic style) to the kite fold. Turn it over and there is another mini concertina booklet tucked in page 6

Page 7/8 
there is another large tag in page 7 and page 8 has been left to enjoy the bird in flight

Page 9 and inside cover. 


Page 9 has a mini notebook made from a spare piece of card folded in half and a mini notebook cut down and the back page glued to the back fold. 

I may add some more decorations, but i have used a good amount of the spare pieces and made some useful additions, as well as the decorated Paperclip, mini notebook and front tile.

I hope you will have a go at this book as it is quick and relatively simple to make and you can experiment with you additional items with plenty of tuck in areas 

The back of the album holds at least 8 photographs so this book would be lovely to capture a particular event or holiday.


Dee

Tuesday 25 May 2021

Making Concertina Books from your stash Style 1

 Hi Crafting Friends

Over the last couple of weeks I have been looking at making mini-books and came across a great way of making them from any size paper pad you have.

The basic style works for 6 x 6, 8 x 8 or 12 x 12 papers, and can be made very quickly leaving lots of time to decorate your book. It is a concertina book with pockets on all the front pages and plain backs for your photographs. 


There are many tutorials on YouTube to make these books and I followed one from Treasure Books, a great lady with some lovely tutorials on journals and envelope books (my next project), it quickly became addictive and I made all three sizes in quick succession.

I have yet to decorate them inside. But thought I would share one I made for a particular friend and decorated ready to send.

To make my version of this book you will need 
4 sheets of 12 x 12 papers of your choice -  I used Fabrika Decoru “Sentimental Story”
1 sheet of 12 x 12 black card

Cut the papers 
The 4    12 x 12 cut to 9” square, save the ends to use in decorating inside
From the black card cut 4 pieces of card 6.5” x 3 5/16” 

For each of the main 4 pieces fold on the diagonal and burnish, fold gently the other way just to mark the centre of the square. Fold all corners to the middle using the folded line as a marker. 
Unfold the corners that are not on the folded line and fold in half 

When all 4 are folded we attach the side triangle to each other to form the concertina 


You now have a mini book with pockets on one side and plain panels on the reverse 

To make the book covers, glue 2 of the black card panels , add one to the outside flap and then glue the other on the other side covering the flap. Do the same for the back flap 


Once the covers are on the basic book is complete. The cover does not go all around as the book needs to open out fully to allow the back panels to be used. I will add a closure by placing an eyelet on the front panel 

In my next post I will show you my page inserts and decorations, and the front finish and closure.

Happy Crafting 
Dee


Monday 17 May 2021

Last Show of AliExpress Items (until the next time)

 Hi Crafters 

Thanks for stopping by, it is lovely to see so many of you checking in, it keeps me motivated.

I am doing a round up of the other items from my last order with AliExpress, as I want to move on to other projects I have made in the last month and to revisit some of my early projects. 

The first item I have used from this bundle is a stamp set of greetings with ticket style matching die.

I thought this was very versatile as I can use it on cards, gift bags and boxes and for Memory books & Journals. The style suits a lot of projects 


Along with other dies which I will show, I also ordered some happy birthday stickers, and Thank you stickers for sending out with Ebay sells. The stickers come on a roll of 500 for about £2.50.

I have bought these before for my Ebay sells, and also for Home backed goodies, as I bake for WI and other events occasionally. 

These are the other dies purchased. The top die is a beautiful cut out Octopus Steam Punk Style, which seems odd, but can be used for cards or mixed media. 

The bottom picture shows an edge die and a set of wedding dies that are mirrored. They would be Perfect for invitation, save the day etc and I am going to use it for a Golden Wedding card.


Going back to the Greeting Stamps and ticket die, the stamps cover many occasions:

Ticket: Valid for 1,000,000 kisses Anytime, Anywhere Admit Two

You're Invited

Handmade for you

You are the best DAD in the World

Happy Valentines Day

Happy Birthday to You

Thank You

Welcome Baby

You are the sweetest MOM in the world

To......     Fro.......

So as you can see they cover a lot of areas of your crafting world

I thought when I bought them you stamped the image and then cut them out, I do  not do a lot of stamping. However when I stamped the image I quickly realised you cannot position the die correctly to cut out after stamping. So cut the tickets first and then stamp out the greeting onto the ticket.

My hands are reasonably steady and the first one worked well, however the second image was slightly lop-sided, and I was not happy with the result. 


So I cut a couple of stamped images out of the card and layered them onto the ticket. I preferred the result and so now I have the option to stamp direct or mount the stamped image  


Here is a picture of my desk with the finished items ready for use.

Back soon with lots of new and old ideas for projects


Dee

Thursday 13 May 2021

Great Paper Clip Dies Item 4 from AliExpress

 Hi Crafters

So here is the next item from the AliExpress Bundle.

I thought these looked good on the website and took a chance on them. As I am currently making Journals and Mini Albums these paperclips could be very useful for decorating and holding items. 


They arrived quickly and total cost for the set of eight styles was £4 including delivery. Very simple to use I cut them as soon as I had time and space to try them out.

If you use a paper that matches or coordinates with your project, these paperclips can be used on any pages to add tags, notes or embellishments that can be added to your layouts. 

Here they are in one of my Kite Books with matching card to the book pages


If you do Journals or Mini Albums etc these make a lovely addition to the pages, and you can tailor them to the users interests.   

Happy Crafting

Dee

Monday 3 May 2021

Shabby Chic Tiles - Another Recycling Project

 Hi Crafters

As its a wet Bank Holiday I thought I would share this lovely idea from GI Kerr. This is my own version but pop along and have a look at her channel on YouTube to see the original.

These are lovely tiles that you can use to decorate your Journals, books or projects


All you need are:

Thick card (I used card from a parcel, you can still see the ridges, but I am quite happy with that)
Pretty papers with small prints and messages 
Glue Glaze such as Glossy Accents

Cover the card with your papers using a standard glue such as PVA add another piece to tidy the back and allow to dry 

Cover the top with Glossy accents and leave overnight before using on your projects 
Gi used a foam card that was beautiful and smooth, but I decided to make this a recycling project and use whatever I had available. Whilst mine have ridges I am not concerned about them, they add to the vintage look.

  I could add a paperclip to the paper I place on the back to make a lovely page decoration for journals etc
Use word tiles for scrapbook pages 
Or simple decorations for mini books as I have on this project


Happy Crafting 
Back Soon
Dee


Sunday 2 May 2021

Sea Horse Box - 3rd make AliExpress stash

 Hi Crafters

Well I am back crafting after my major sort out. Today’s make is from a very lovely seahorse box die. It comes in 2 parts and I think you can buy other end panels to use instead of the sea-horse, but I have lots of box dies and my own templates so just bought this set as I fell in love with the Seahorse.


This is a very simple set to use. There is a box die that cuts out the shape and scores the folding lines 

And then you simply cut 2 of the seahorse panels which have a flap at the base and you fold over the flap and stick to the base of the box.

Here are the 2 dies used.


 The box itself is small but perfect for a couple of fancy chocs or jewellery
You need to secure the seahorse cut-out to the side of the box, or as I have, tie it at the top to keep it together. 
The dies came from Top Expresssions at AliExpress, they came super quick and total cost including taxes was £8.20 for both. You can buy other panels and I am in the processing of adding a bride and butterfly to the collection and maybe a carriage, they cost between 2.80 and 3.80 each 

Having made the box and panel as it is shown I decided to see what else I could do with it. 
So here is a larger box decorated in the same way and a greeting card.


Both have been made with 12 x 12 ocean paper pad from the Range. These basic card pads are double sided and offer great value at £2.99 for the 12 x 12 packs, with 24 sheets. Although the card is not top quality it is perfect for trial projects and backing paper, and is thick enough to make sturdy boxes.

For the greeting card I used 2 sheets of A4 white card that was textured. The first sheet I cut down to 11.5” x 5.75” to fit nicely into my 6” envelopes
I then cut a piece of the blue card from. 12 x 12 sheet to measure 5.5” square, and cut my seahorse from another part of the same sheet. I cut another  piece of white card from the second sheet measuring 5.5”square and then simply layered them up placing the tab at the bottom of the seahorse under the 5” white square before placing it onto the card. I secured the top part of the seahorse with my Glossy Accents glue as it dries quickly and has a fine nozzle. 

I hope you enjoy these ideas and look at your dies to see which ones can be used in the same way.

Dee