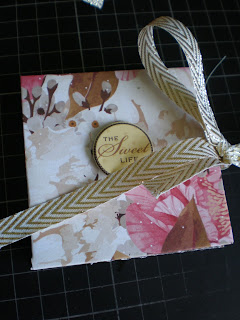
Following on from yesterdays mini book I made the following Brag books. Real little treasures for all your mini photo's and memories.
Again these use one sheet of 12 x 12, although for the 3" book you will need some extra for the outer covers.
Score the 12 x 12 at 3",6",9"
Turn and score the same again.
On the first and third score line cut up to the third/last score line
Turn the sheet 180 degrees and on the 2nd score line cut up to the third/last score line
From the bottom right hand side fold the 3" squares bback and forth all the way around until you have a booklet.
Next ignore the first square as this will form the cover and then glue the next 2 pages together, continue gluing the pages together, some will be left to right and some top to bottom so do a trial before starting to glue to make sure you know how the pages go together.
Using scrap card (I use my cereal box card for this) cut 2 pieces of 3.25" square card and cover with pretty papers, to form the book cover
Before gluing these onto each side of the book add ribbon around the book for a fastening.
These mini books have 16 3" x 3" pages just right for pictures of family and friends. It would make a great gift for granny or mum, or add your own fun pictures of outings and parties etc for school friends.
Book 2:Mini Book with flaps
For this Minibook, fold the page in half top to bottom
Open out and turn, and with the page on its side score at 2" and 10"
Now, looking up the page you have a score line at 2" a fold at 6" and a score line at 10"
Turn the page and fold in half and then each half back to form 4 sections top and bottom
Fold the scored lines over so the flap is inside
On the centre fold cut up the fold along the first 3 sections
Starting on the right hand bottom side, fold the creases back and forth, when you get to the end fold up and then continue folding until the booklet is formed, run your bonefolder over the sections so they lay flat
Using a strong tape fasten the flap ends and glue the middle fold to hold the booklet together
You now have 8 sections to store your photos and memorabilia, plus if you do not stick down the back of the booklet with ribbon fastenings, instead add ribbon that will go all the way around but only glue to the front of the booklet , you can add photographs to the 6 back pages.
As you can see I made 2 of these and have added a scrapbook phrase to the front of one and a 3D embellishment to the other
If you need a video to follow check out brag books and mini albums using 12 x 12, on YouTube.
Dee


No comments:
Post a Comment
Make a comment